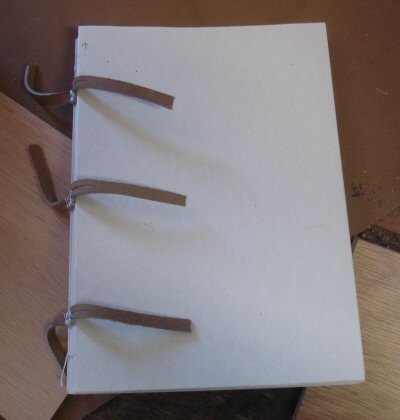
Fig 1: The text block, already sewn (including the endpapers). The sections have four sheets of A4 paper, folded in half.
Crispin Sexi (Jaysen Ollerenshaw), November 2010.
This article shows some of the stages involved in binding a late 14thC-style medieval book. The techneques are based on my own generalisation of the later Romanesque and early Gothic styles detailed in Szirmai, with a few simplifications of my own devising.
Fig 1: The text block, already sewn (including the endpapers). The sections have four sheets of A4 paper, folded in half.
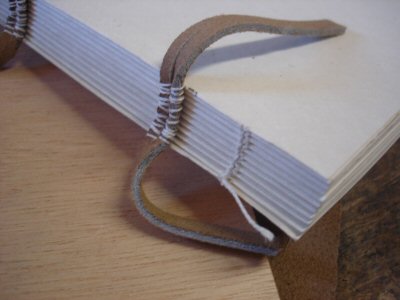
Fig 2: The spine of the text block, showing the split leather thongs and the kettle stitches.
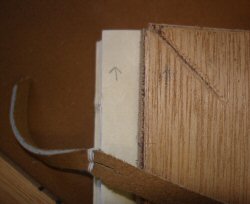
Fig 3: Lining up the boards to mark where the the thongs will go. The outer edges of the boards have been bevelled. I have used 5mm five-ply wood, cut just slightly smaller than the text block.

Fig 4: Cutting indents for the thongs on the outer edge of the cover boards. These should possibly be cut as holes into the edge of the boards, but I find this method simpler when using plywood covers.
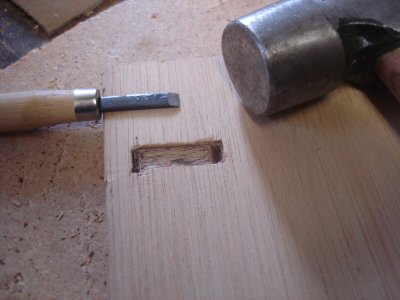
Fig 5: Cutting the channel on the inside cover.

Fig 6: Outside cover showing holes for lacing.
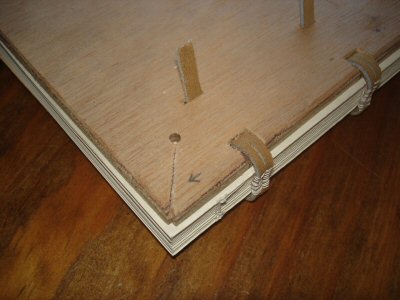
Fig 7: The text block is laced to the boards.
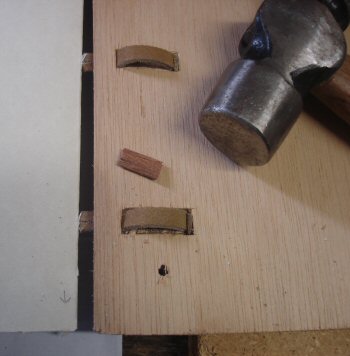
Fig 8: Securing the boards using small wooden wedges. Any protuding part of the wedge is cut off.
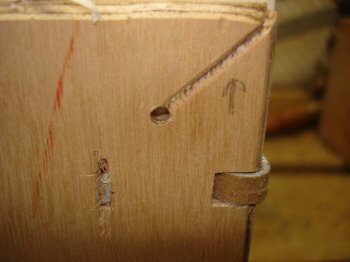
Fig 9: The thongs are trimmed to be flush with the outer cover.
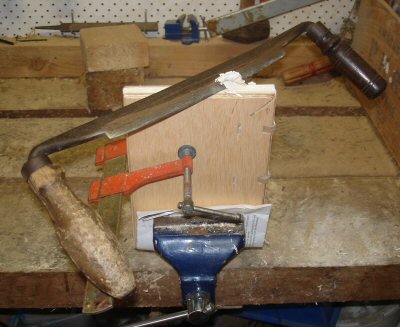
Fig 10: A drawknife is used to trim the text block even with the cover boards.
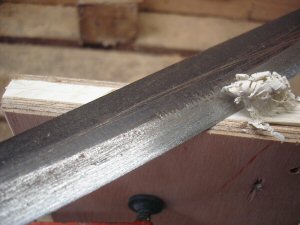
Fig 11: Close up of the text block being trimmed.
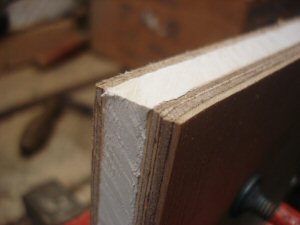
Fig 12: Trimmed corner.
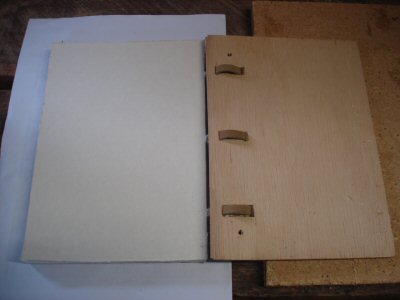
Fig 13: The book, now laced and trimmed, lying open.
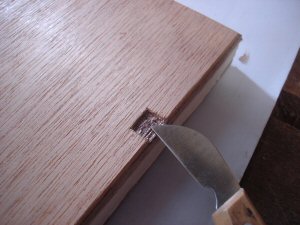
Fig 14: I took this chance to cut an indent for the closing straps. This can be done any time before covering.
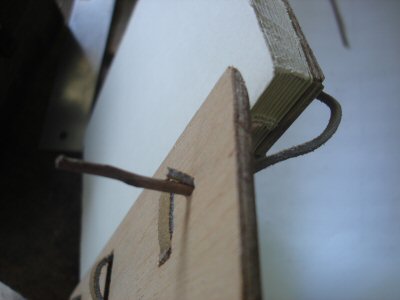
Fig 15: Attach the leather endbands. I drilled the endband holes, so used a twig to peg the leather and then cut it off flush to the board.

Fig 16: The endband lying in place. I've shaved it slightly so that it will sit flat in the channel.
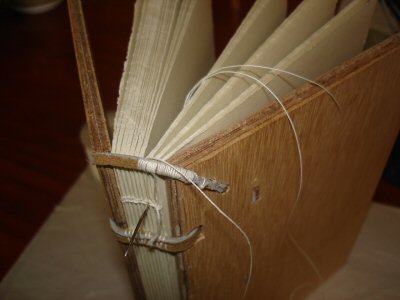
Fig 17: Sewing of the endband. The thread is wound around the leather band and stitched to the text block roughly every five loops.
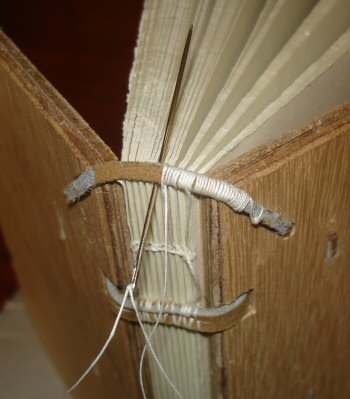
Fig 18: Still sewing the endband.
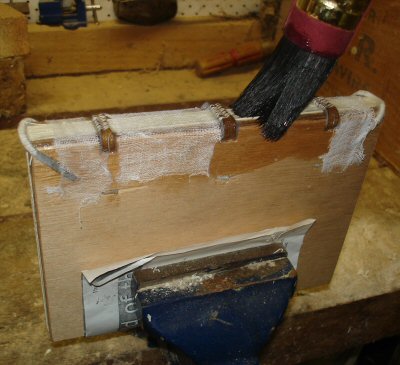
Fig 19: Pasting thin cloth on the spine. The paste is simply flour and water, cooked until gluggy with a little salt. Pasting the spine helps make the book more firm. Later gothic books used animal-based glue on the spine rather than starch-based paste.
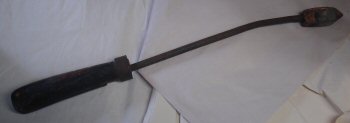
Fig 20: I heated this soldering iron in a pot of boiling water to do the blind-tooling on the leather cover. The heat will leave permanent indents in the leather
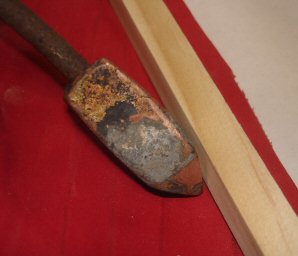
Fig 21: Testing out blind-tooling. I think maybe boiling water isn't quite hot enough to do blind tooling, but it's pretty close.
Fig 22: The leather cover pasted on, showing a simple blind-tooled rectangle as decoration. (Sorry for the lack of photos, but it's hard to stop and take a picture in the middle of pasting the cover on.)
Fig 23: Inside cover. Note the scrap paper to keep the paste away from the text block.
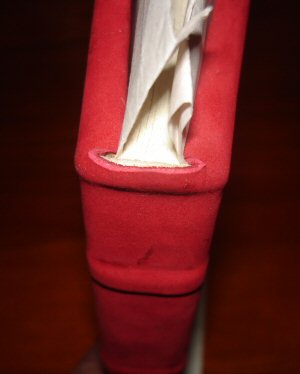
Fig 24: The endband, now partly covered.
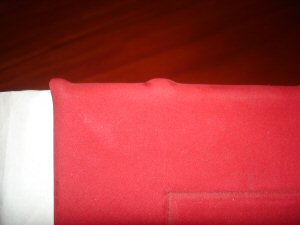
Fig 25: The leather thongs have become raised bands on the spine.
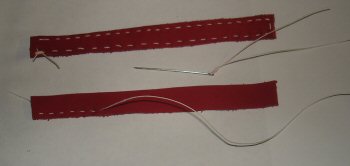
Fig 26: Straps, sewn to help prevent stretching.
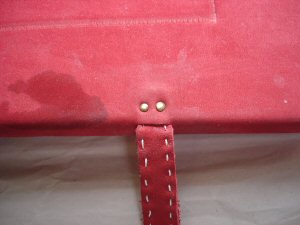
Fig 27: The straps nailed in place. One of the benefits of a real hard cover in the binding is being able to use nails.
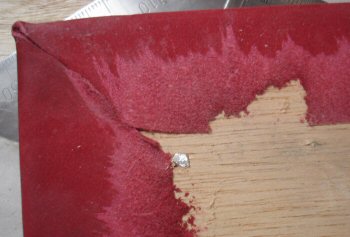
Fig 28: The inside cover, showing a nail and a mount filed off, and also showing the paring of the leather to make a gentle slope.
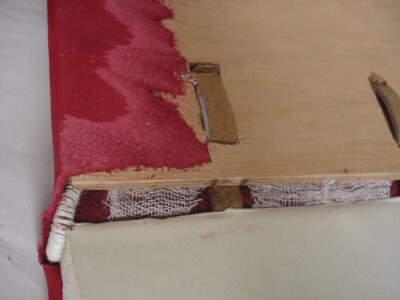
Fig 29: Inside cover at the spine.
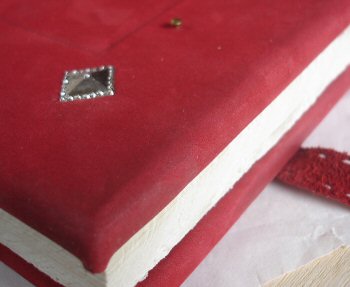
Fig 30: A nail for hooking the strap to, and a pewter mount. Holes for the mounts had to be drilled after the cover was pasted on. The mount is based on #1068 on page 119 of Egan.
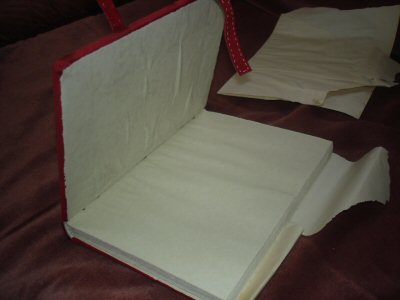
Fig 31: Endpapers now pasted down. They are a little wrinkly due to expanding when covered in paste.
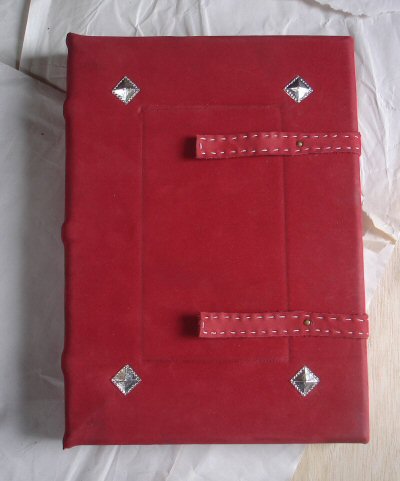
Fig 32: The finished book.
Szirmai, J.A., The Archeology of Medieval Bookbinding, Ashgate, Aldershot, 1999.
Also, thanks to Linda for generously lending me the above book.
Egan, Geoff, Dress Accessories, Museum of London, Boydell Press, Suffolk, 2002.
Copyright Jaysen Ollerenshaw 2010. Free use for non-profit.
Joan & Crispin's Homepage: http://aelflaed.homemail.com.au/